
Want to learn about the Internet of Things and how to work with a sensor? I did too! I’ve been experimenting with the “Internet of Things” (IoT) since 2014 and have learned about the challenges with my sensor project: the AirQuality Lab. In the beginning, I just wanted to create something and work with the components. The scope of my side project was to read values from a sensor, transfer it to a thing-backend and then learning from the data. This post starts with the basic setup of the Thing and the following posts will cover further points.
After finishing a project in late 2014, I played around to learn a bit more about the Internet of Things (IoT) stuff for my next project. So, it was (and is) proposed, that “everything is connected in 2020” and I had to think about a product, product strategy and technical implementation in this area. Our thoughts about a domain model for IoT at this time was, to reduce everything to a source and a drain. Well, as hardware is cheap (but this is not all) I bought a Raspberry PI, a bunch of sensors and a small LCD display. Inspired by the CubeSensors, I wanted to measure air quality with the sensors and work with the derived data. This should help to understand how things process data, how to transfer it, how to analyze and derive information from it. I started the AirQuality Lab.
The sensor for the AirQuality Lab
It all started with the decision of whether to use Arduino or a RaspberryPi. A pro for the RaspberryPi was full Linux, the ability to use every coding language and easy and cheap Wi-Fi. I selected sensors on breakout boards with available source code. I didn’t want to do the lower level myself, so the latest was important. I’m not used to shifting bits around, but it is somewhat familiar, while pitching gains and other stuff is from the last century. I chose I²C sensors when available, to have the values digitally and to reuse the limited pins on the Raspberry Pi. These are the sensors:
- TSL45314
- BMP180 (updated to BMP280)
- SHT15
- Seed Studio Air Quality Sensor 1.0 / 1.3 (via Adafruit ADS 1015)
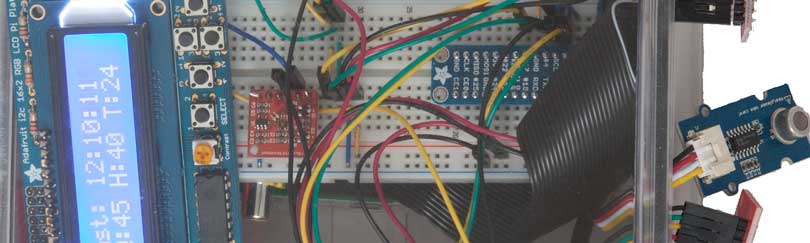
- I also added an LCD display in the first version for debugging purposes.
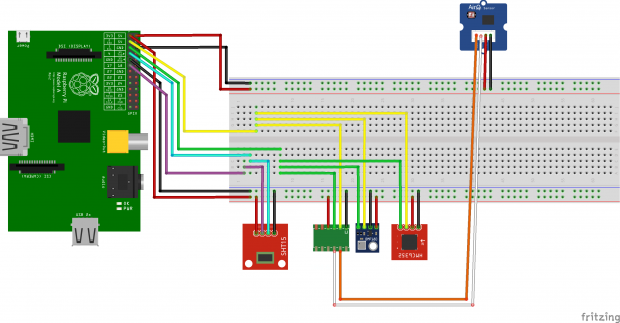
The AirQuality Sensor is not digital. An Analog-Digital-Converter was necessary to convert the signal into digital values. I chose the Adafruit ADS 1015 for this task. The SHT15 is also not fully compliant with I²C; it is addressable via an equivalent protocol.
I connected them as shown on the Fritzing wire diagram.
The code for the AirQuality Lab
Step by step I soldered the pins to the sensors and connected everything to the device. If you build up an electronic circuit, the smoke test is a particularly thrilling step and awesome if it works. To see it working on the RaspberryPi, it is easy to observe the sensors working. After setting up the I2C kernel module and installing the i2c Raspian packages, you can execute:
$> sudo i2cdetect -y 1
     0  1  2  3  4  5  6  7  8  9  a  b  c  d  e  f
00:          -- -- -- -- -- -- -- -- -- -- -- -- --
10: -- -- -- -- -- -- -- -- -- -- -- -- -- -- -- --
20: -- -- -- -- -- -- -- -- -- 29 -- -- -- -- -- --
30: -- -- -- -- -- -- -- -- -- -- -- -- -- -- -- --
40: -- -- -- -- -- -- -- -- 48 -- -- -- -- -- -- --
50: -- -- -- -- -- -- -- -- -- -- -- -- -- -- -- --
60: -- -- -- -- -- -- -- -- -- -- -- -- -- -- -- --
70: -- -- -- -- -- -- -- 77
Getting a response at the desired address of the sensor, found in the spec, is a great test to see if the wiring is good.
Next step: read out the sensor values. For some sensors I found Java code, but for others there were only just Python and Arduino C code. To test sensor functionality and correct wiring, it is good to have Python code, because it allows quick testing without compiling something. However, to connect to the Cloud of Things, I wanted the code in Java, so I had to rewrite it. Sometimes it was a nerve-wracking process for me, because there are some differences in bit shifting, data types and pointer arithmetic. In the end, I had all the code to read out the sensor values.
I have put my code for the sensors on Github (rpi-java-sensor-lib), so if you like, you can try it yourself. This is a good time to say thank you to the people who have written the code I used to get it working. If you’d like to try it yourself, use these commands. These steps include the complete build steps, so you need to have some packages installed. You can also package the jar on another computer, then just move the jar file to the Raspberry Pi and run it via the last command.
$> sudo git clone https://github.com/marquies/rpi-java-sensor-lib.git
$> cd rpi-java-sensor-lib
$> mvn package
$> sudo java -cp examples/target/examples-1.0-SNAPSHOT-jar-with-dependencies.jar de.patricksteinert.rpisensorlib.examples.AdafruitBMP280Example
Chip ID : 0x58
Pressure : 999.26 hPa
Temperature : 24.33 °C
Temperature : 75.79 °F
Altitude : 165.04 m
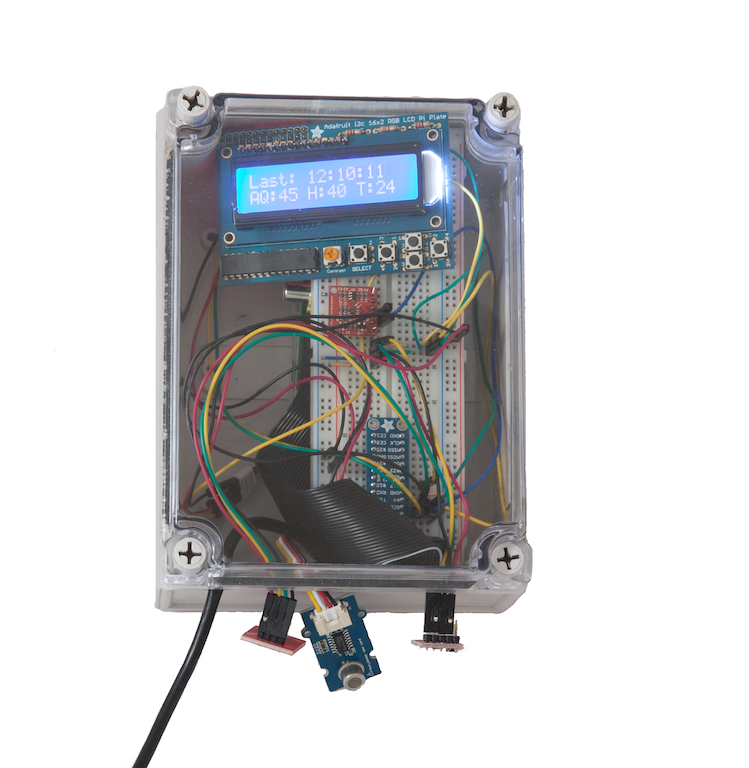
For the first prototype, I put all of the electronic components into a simple case with the prototyping board. I tentatively pulled the sensors to the outside of the case, to allow them to access to the room air. It looks like this:
Finally, I wanted to transfer the data to a thing-backend. I worked on the Cloud of Things, so this was my natural choice. For transferring the data I used a special client, which will be part of another post. The AirQuality Lab has now been running for two years, transferring the sensors’ data every thirty seconds, every minute, hour, day and year. I have a dataset of 630k+ observations to work on with data science tools, which will also be discussed in a future post.
Conclusion
I have learned many things during this project, especially the following:
- I know how to move bits over the wire, read registers and all the basic stuff. It helped me to understand how machines communicate.
- I learned how much work it is to output simple text on an LCD display.
- I understood how to structure payload to transfer sensor values in different ways.
- I have got a sense of how storing and reading “mass” data should be.
If you like this project and want to read further articles, make sure that you have subscribed to the RSS feed of this site or follow me on Twitter. I’d also appreciate feedback in the comments below or on Twitter.